We first eat with our eyes and then with our mouths. Taste is as much as everything in a good bake, but so is the presentation. Actually, one of the quickest expanding baking trends in 2025 is visual artistry.
We like sprinkles and garnishes, but cakes with creamy swirls, stars, roses or leaves immediately attract our attention. These are designed through piping.
In simple terms, piping is the craft of applying frosting, icing, or edible substances in order to form decorative patterns onto cakes, cupcakes and pastries. It is a foundation of ornamental baking- to turn a plain bake into a work of art in a few strokes.
In this guide, we will discuss the tools that are a must-have, the most popular cake piping styles, cupcake piping ideas, cake icing piping techniques, and the mistakes that should be avoided.
What Are Piping Tools and Why Do They Matter?
Piping tools are necessary to decorate a cake, just like a whisk is necessary to mix. They enable bakers to make creative designs come true with accuracy and style.
Fun fact: the art of piping dates back to the 17th century, when elaborate decorations using sugar were a feature of high-end desserts. Modern tools and trendy piping methods, such as Russian tips or ombre swirls, have raised this art to a new level today.
Must-Have Piping Tools to Spice Up Your Décor
The India Bakery Ingredients Market is forecast to grow at a CAGR of 9.11 %, driven by demand for healthier, clean-label ingredients. Here are the must-have piping tools that you can use to spice up your décor:
1. Piping Bags
- Disposable: Light plastic, ideal for quick projects or in different colours.
- Reusable: Silicone or cloth, best suited to frequent bakers.
- 2025 Trend: Multi-chamber piping bags allowing you to pipe two-toned or ombre effects without having to switch bags.
2. Piping Tips (Nozzles)
These determine the form and feel of your design. Popular options include:
- Round tips: writing, outlining, beads, or dots.
- Star tips: to stars, rosettes or shell borders.
- Leaf ends: foliage patterns.
- Petal tips: delicate petals such as roses and daisies.
- Basketweave tips: to create rustic woven patterns.
- Russian Piping Tips: make 3D floral designs fast and highly popular on Instagram.

3. Couplers
A coupler is a convenient two-part connector that enables one to change piping tips easily and fast without refilling the bag. This tool is particularly helpful in the case of several designs on the same cake. It saves time, minimises mess, and maintains consistency in your frosting, which is why it is a necessity for both beginners and professionals.
4. Flower Nails
Flower nails serve as a rotating base to make small flowers such as roses, daisies or chrysanthemums. You pipe the flower on the nail and then on the cake after it has set. This method is more controlled and precise, creating clean and professional-looking floral arrangements. They are a necessary resource to anyone who wants to learn how to do floral piping.
5. Turntable
A turntable is needed to frost and decorate the cake smoothly and evenly. It enables the cake to spin freely during piping to provide uniformity in borders and designs. Tilting turntables are commonly used by modern bakers to do finer work on the sides and borders of cakes. A solid turntable will help to make the decorating process smoother and more professional, be it buttercream or elaborate piping.
Cake Piping Techniques
Moreover, the Indian baking ingredients market alone is forecast to reach USD 1,341.1 million by 2030, growing at a CAGR of 8.5 %, reflecting strong ingredient demand for decorative techniques like piping. If you want to make a career in this field, make sure that you are aware of these common cake piping techniques.
1. Piping Stars
How to do it:
- Use a star tip held at a 90° angle.
- Put consistent pressure on it, release and lift to make clean, defined stars.
- Hold your hand steady like even shapes and sharp points.
Best for:
- Borders and edging
- Textured cupcake tops
- Covering large cake areas
- Incorporating the fun, dimensional details.
Keep it neat:
- Uniform size and spacing = business appearance.
- Irregular stars may cause designs to look sloppy.
Pro Tip: Chill your icing before use. It makes the edges sharper and the stars do not look soft or melted. If you’d like to explore these fundamentals in depth, our cake decorating course covers everything from beginner piping skills to advanced artistry.
2. Piping Dots
How to do it:
- Use a round tip.
- Use soft pressure (do not squeeze hard).
- Place the bag to complete with a neat, rounded dot.
Best for:
- Polka-dot designs
- Bead-style borders
- Accents on floral designs
- Light fillers to light decoration.
Keep it neat:
- Precision + spacing between lines = a smooth appearance.
- Uneven dots can look messy.
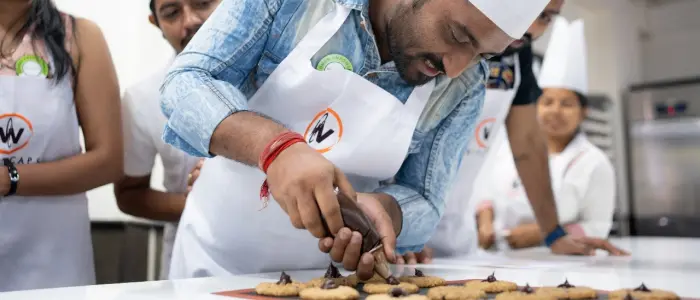
Pro Tip: Try your spacing on parchment paper beforehand. Before you decorate your real cake or cupcakes, it will teach you how to place them. For those who want to sharpen these skills over a short timeframe, our weekend baking classes provide the perfect hands-on training experience.
3. Piping Shells
How to do it:
- Use a star tip at a 45° angle.
- Squeeze, push a little to the right and let go.
- At the end of the shells must be a small tail or curve.
Best for:
- Cake borders
- Edge detailing on cupcakes
- Classic celebration cakes
Keep it neat:
- Keep the pressure and angle constant.
- Overlap a little to get a continuous, flowing border.
Pro Tip: It is important to keep your piping bag at the same angle of 45 degrees each time, so that you will always have evenly-shaped shells.
4. Piping a Rose
How to do it:
- Use a flower nail as your base.
- Draw a small cone of buds, and then place petals around the bud.
- Enlarge petals and space them out.
Best for:
- Wedding and anniversary cakes.
- Elegant cupcake toppers
- Romantic or flowered desserts.
Keep it neat:
- The petals have to overlap each other a bit.
- Turn the nail continuously to achieve an even coating.
Pro Tip: To achieve quick and beautiful results, use Russian piping tips, which are quicker and more dramatic in making floral designs.
5. Piping Rosettes
How to do it:
- Apply a star tip and begin at the centre, and move outward.
- Spiral pipe, making it easier as you go.
- Finish off with a gentle swirl.
Best for:
- Full cake coverings
- Cupcake toppings
- Ornamental overlay on desserts.
Keep it neat:
- Make sure there are no gaps in the spiral movement.
- Always maintain consistency between spacing to create a consistent finish.
Pro Tip: Rosette piping technique is all the rage on Instagram reels. It is the best way to display your decorating talents and make treats that look beautiful and delicious.
6. Piping Leaves
How to do it:
- Use a leaf tip.
- Press, drag, and release a tapered end.
- A little twist will make it look like a vein.
Best for:
- Floral (roses, daisies, bouquets)
- Flowered cakes (wreath and garden).
- Adding contrast and texture
Keep it neat:
- Slightly change the size to resemble natural leaves.
- Avoid over-crowding. Keep space for breathing room.
Pro Tip:
Use two-tone icing in a dual-chamber bag for realistic colour depth and a professional finish.
7. Piping a Basket Weave
How to do it:
- Use a basketweave tip.
- Draw horizontal and vertical lines to resemble a woven texture.
- Roadmap or draw lines to get a straight spacing.
Best for:
- Cake sides
- Rough or old-fashioned design.
- Floral or seasonal base layers.
Keep it neat:
- Keep the space between the lines straight.
- Maintain straight lines when the pattern is clean.
Pro Tip: Basket weaves are on the rise as a trendy and vintage-themed celebration. Add few flowers or leaves to make the design even more.
8. Piping Daisies
How to do it:
- Use a petal tip.
- Begin in the centre and run outwards petals, a bit overlapping.
- Add a contrasting centre dot to make it look real.
Best for:
- Cakes with a spring or garden theme.
- Flowered cupcakes.
- Bright and user-friendly layouts.
- Royal icing piping techiques are used in elaborate lace patterns, delicate filigree, and decoration of cookies.
Keep it neat:
- Maintain the lengths of petals.
- Symmetry: Use a rotated work surface, not a rotated hand.
Pro Tip: Vary the length and colour of the petals to make realistic and eye-catching daisy clusters to make your bakes bright.
Bonus: Royal Icing Piping Techniques
How to do it:
- Use a small round tip.
- Use continuous, uniform pressure on accurate lines.
- Do not touch before the icing is dry.
Best for:
- Lace and filigree work
- Cookie decoration
- Decorating wedding cakes with fine details.
Keep it neat:
- Make sure the icing is neither too thin nor too thick.
- Do practice with straight lines and then practice on the final surfaces.
Pro Tip: To make the latest twists, vegan royal icing is a trending item that is great for detail work but also fits the vegan diet.
Piping Techniques for Cupcakes
So, what are the latest piping techniques? Cupcakes are a smaller canvas with unlimited possibilities.

- Classic Swirl: Timeless favourite with a star tip.
- Floral Toppers: Mini roses or daisies.
- Ombre Swirl: Trending, with multi-chamber bags.
- Two-Toned Swirl: Ideal with contrast colours.
- Drop Flowers: Rapid designs with drop flower tips.
- Ruffle Topping: Fabric-like finish.
- Zigzag Design: Ideal for children’s cupcakes.
- Wavey Hair: Fresh and Instagram-ready.
- Mini Rosettes (Trending): Ideal bite-size cupcakes.
Common Piping Mistakes and How to Fix Them
Even pros slip up sometimes. The following are some of the mistakes to avoid:
- Frosting too soft: refrigerate briefly to harden.
- Fulled piping bag: Fill with less to control.
- Wrong angle: 90 dots, 45 shells, 30 writing.
- Missing couplers: Never miss them to prevent untidy refills.
- Uneven pressure: Practice on parchment, then pipe on top of it.
Conclusion
Piping is not merely a decoration technique but a narrative technique of design. Whether it is borders and rosettes, or even royal icing lace, each method will give your bake personality. The opportunities in 2025 are boundless with such tools as Russian piping tips, multi-chamber bags, and vegan royal icing.
Therefore, when you pick up a piping bag next time, keep in mind: patience, practice, and creativity are your new best friends.
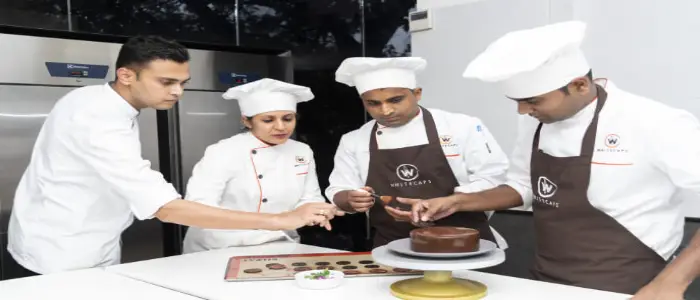
In Baking and Pastry, our Professional in Baking and Pastry programme at Whitecaps, we teach all these piping techniques (beginner to advanced) with award-winning chefs. Are you willing to make piping a career? Explore our courses today or get in touch with us to find the right course for you.
FAQs
Q1. What are the latest piping techniques in 2025?
Trending techniques include Russian piping tips, ombre swirls, and textured wave designs.
Q2. Which piping tips are best for beginners?
Round tips for dots and star tips for basic swirls are the easiest to start with.
Q3. Can royal icing be used for cake piping?
Yes, royal icing is excellent for intricate lace and cookie decoration, though buttercream is more common for cakes.
Q4. How do I fix uneven piping designs?
Practise on parchment, use steady pressure, and ensure frosting consistency is correct.
Q5. What’s the difference between cake and cupcake piping techniques?
Cupcakes use smaller designs like swirls and drop flowers, while cakes allow for larger borders, basket weaves, and layered florals.